Gitpod
First-time setup
Section titled “First-time setup”-
Sign up or sign in to Gitpod
-
Select ‘Continue’.
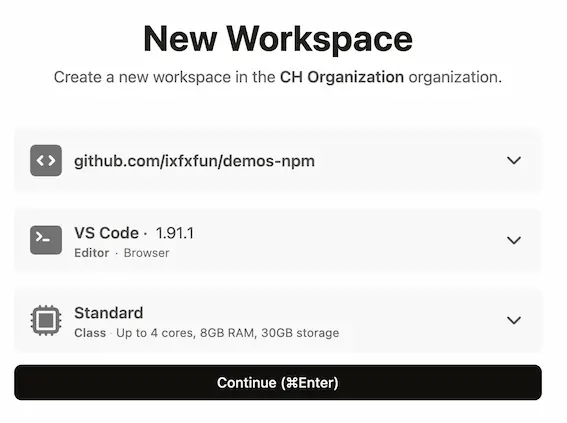 It will churn away from a while, and then you are presented with essentially VS Code running in the browser.
During startup, it will ask if you want to install recommended extensions. Say ‘Install’ for all of these.
If for some reason you lose the address to view your running sketches, click on ‘Ports: 5555’ which should appear in the status bar of Gitpod. This will open a panel, and it should list ‘ixfx demos’ with a green dot. Click on the globe icon to open it in a browser.
Using a local editor
Section titled “Using a local editor”Gitpod has the neat option of editing files locally, but running them in the cloud. To access this, click on the burger menu at the top-left and choose ‘Gitpod: Open in VS Code’. There will be a heck of of a lot of prompts to install this and that, but if it all works, you should get a local VS Code editor.
Running
Section titled “Running”Click ‘Go Live’ to start a web server.
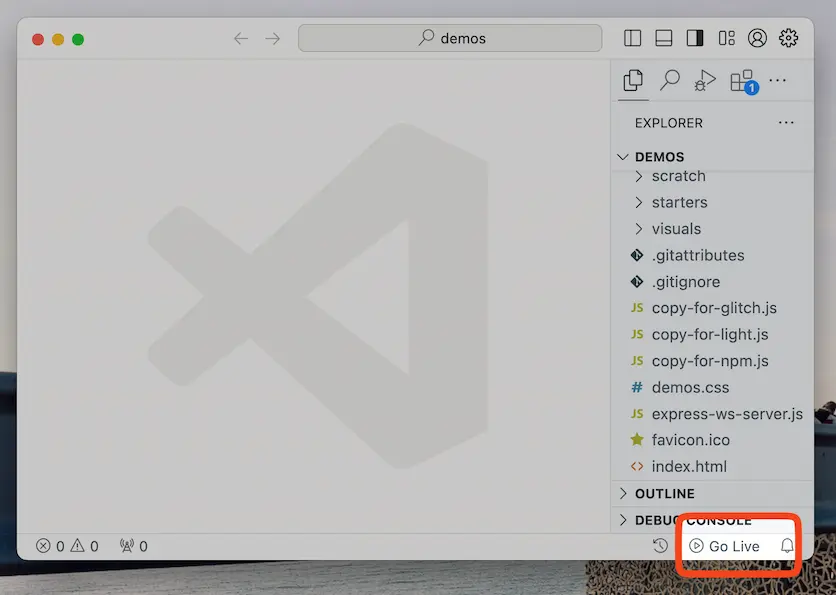
A new browser window should pop up to view your sketches.
When editing, only edit things under the src/ folder. A docs/ folder is created and contains the built version of your files. Do not edit anything under docs/.
You’re also able to use files written in Typescript too!
Advanced
Section titled “Advanced”Websockets
Section titled “Websockets”By default, the server that starts does not include websockets. In the Gitpod terminal, press CTRL+C to stop the server, and run npm run ws.
Because the connection is encrypted, in your sketch you’ll have to change the websocket URL from ws:// to wss://
Eg:
const settings = Object.freeze({ remote: new Remote({ allowNetwork: true, websocket: `wss://${window.location.host}/ws` })});